

Residual Current Protection Explained: RCDs, Vigi Modules, and Electrical Safety
How residual current devices work, why 30 mA protects people while 300 mA guards against fires, and how WZSMO Vigi modules bolt onto SNSX MCCBs.
Read More English
An AC contactor should be the quietest component in your control panel. Energize the coil and it clicks closed. Cut the signal and it snaps open. For years, nothing happens. Then one morning a motor refuses to start, the contactor chatters like a trapped insect, or the smell of burning varnish drifts out of the cabinet.
Contactor failures are rarely random. They follow patterns, and every pattern has a known cause and a known fix. This guide covers the seven most common AC contactor problems, how to test each one safely with a multimeter, and the maintenance habits that keep a contactor running for millions of operations instead of thousands.
An AC contactor is an electrically operated switch built for power circuits. A low-power control signal energizes an electromagnetic coil, which pulls the armature down and closes the main contacts so current can reach the motor. When the coil de-energizes, return springs snap the contacts open. Because this switching happens under load, contactors carry arc-suppression systems that a control relay does not need.
That simple sequence defines four fault zones: the coil circuit, the main contacts, the auxiliary contacts, and the mechanical linkage between them. Nearly every failure lives in one of these four zones, which is why a systematic check finds most problems in under ten minutes.
A contactor that vibrates, hums, or clicks rapidly is usually starving for coil voltage. The coil pulls in, the line voltage dips under load, the magnetic force drops, and the springs pull the armature back — then the cycle repeats at 50 or 60 Hz. A worn or broken shading ring (the copper loop on the pole face that holds the armature during the AC zero crossing) produces the same symptom with correct voltage.
Check: Measure the voltage directly at the coil terminals while the contactor is energized. Compare it with the nameplate rating. If the reading is 10% or more below rated, find the drop.
Fix: Look for long control wiring, undersized conductors, or a transformer that is too small for the coil inrush. If voltage is fine but the buzzing continues, the shading ring is damaged and the contactor should be replaced.
You hear it pull in, the PLC shows the output is on, but the motor stays dead. The usual culprits are pitted or oxidized main contacts, loose terminal screws, or a broken load-side conductor. Contact resistance has climbed high enough to block current, even though the contacts look closed.
Check: De-energize and lock out the circuit, then measure continuity across each main contact with a multimeter. A healthy closed contact reads near zero ohms. Then check the terminals for signs of heat and the conductors for breaks.
Fix: Tighten every terminal to the rated torque, dress lightly pitted contacts, and replace the contactor if the contacts are badly burned or the housing shows heat damage.
Overvoltage is the classic coil killer, but sustained undervoltage can be worse: the armature never seats fully, coil current stays at inrush level, and the coil cooks itself. High ambient temperature and continuous duty in a sealed cabinet shorten coil life too.
Check: Smell for varnish, look for a discolored or swollen coil, and measure coil resistance against the datasheet value. A coil that reads open circuit is dead.
Fix: Replace the coil or the whole unit with the same rating, verify the control voltage under load, and improve cabinet ventilation.
If the motor keeps running after the stop button is pressed — or the unit does not release when the coil is de-energized — the contacts have welded shut. The usual causes are an over-current condition, switching a motor load with a contactor rated for resistive duty (AC-1 instead of AC-3), or very frequent starting that never lets the contacts cool.
Check: Confirm power is off, then inspect the contact faces. Welding leaves obvious fusion marks on the silver alloy.
Fix: Replace the contactor and correct the root cause: match the utilization category to the load and allow adequate contact margins. For motor duty, size against AC-3 as described in our AC contactor selection guide.
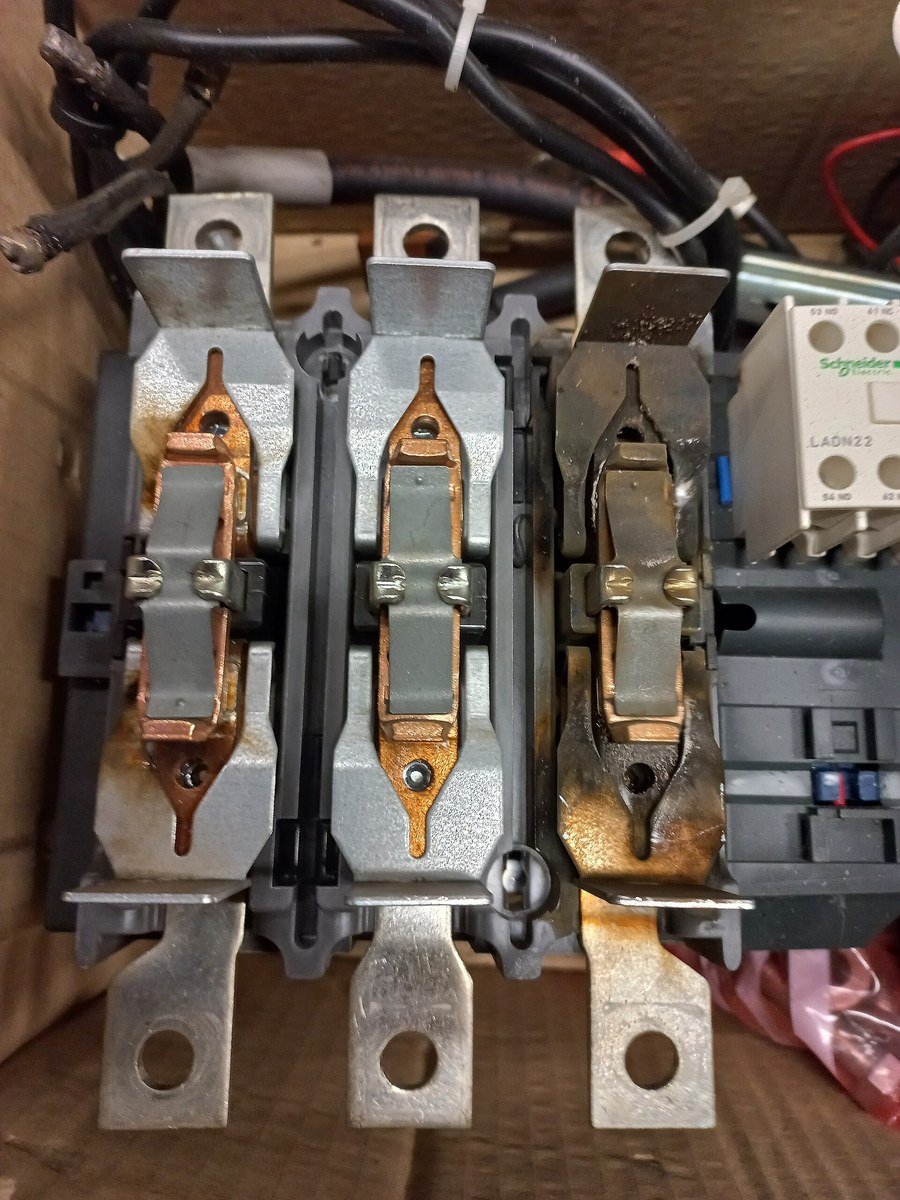
Warm is normal. Hot enough to discolor the housing is not. Overcurrent, loose terminations, poor airflow, and high ambient temperature all push a contactor past its thermal limit. Heat accelerates contact oxidation, which raises resistance, which generates more heat — a spiral that ends in failure.
Check: Measure the actual load current per phase and compare it with the contactor rating. Use a thermal imager or careful touch test to find hot spots, which usually point to a loose connection.
Fix: Reduce the load or step up to a larger frame, re-torque all terminals, and make sure the panel has enough airflow. If the installation runs above 40°C ambient, derate the contactor.
No click, no movement, nothing. Work backwards from the coil: is the control voltage present? Is the coil itself open? Is the control circuit — pushbutton, relay, PLC output, fuse — actually delivering the signal?
Check: Measure voltage across the coil terminals. If rated voltage is present and the contactor still does not pull in, test coil resistance. If no voltage arrives, trace the control loop: blown fuse, open overload relay contact, and faulty PLC outputs are the usual suspects.
Fix: Replace the faulty component. Test the coil at the same time, because a coil that failed once may have been damaged by the same event that killed the circuit.
Auxiliary contacts carry only small control currents, and that light load lets a thin oxide film build up on the contact faces. One day the seal-in circuit does not hold, the status feedback never reaches the PLC, or the interlock stops working. The main contacts may be perfectly fine while the auxiliary block is dead.
Check: With the coil energized and de-energized, measure continuity across the auxiliary NO and NC contacts. They should mirror the contactor state exactly.
Fix: Clean the contacts or swap in a fresh auxiliary block. Quality auxiliary contacts are a bolt-on component on most LC1D-style contactors, so replacement takes minutes, not hours.
| Symptom | Most likely cause | Quick check |
|---|---|---|
| Chattering or buzzing | Low coil voltage, damaged shading ring | Measure coil voltage under load |
| Clicks but motor dead | Pitted contacts, loose terminal, broken wire | Continuity across main contacts, torque check |
| Burnt coil | Overvoltage, sustained undervoltage, heat | Coil resistance, control voltage, ventilation |
| Welded contacts | Overcurrent, wrong utilization category | Inspect contact faces, verify AC-3 rating |
| Runs hot | Overload, loose termination, no airflow | Per-phase current, thermal scan, torque |
| Won’t pull in | Open coil, control circuit fault | Coil voltage, coil resistance, control loop |
| Auxiliary contact failure | Oxide film, light-load wear | Continuity of NO/NC in both states |
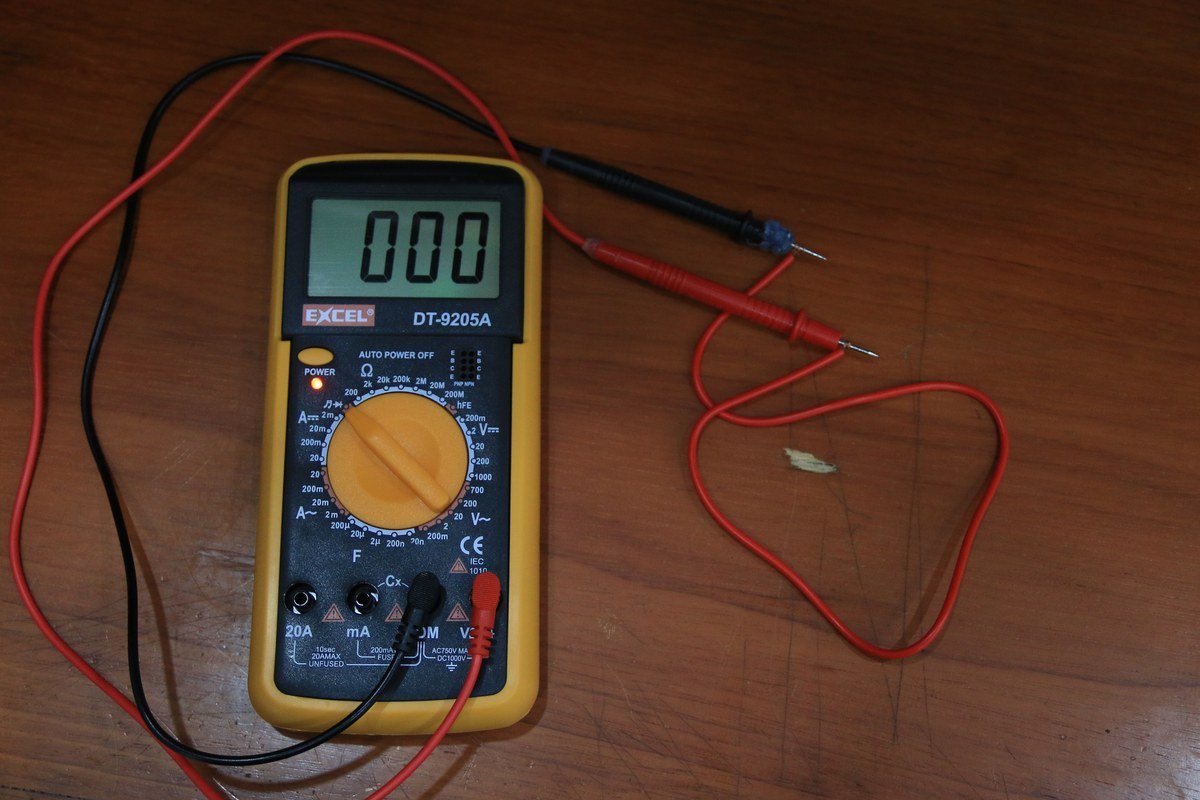
A standard multimeter is enough to diagnose nearly every contactor fault. Follow these steps in order, and always de-energize the circuit before touching live parts.
Not every fault needs a new contactor. Loose terminals, burned auxiliary blocks, and replaceable coils are cheap, fast fixes. Welded contacts, a charred housing, or a contactor that has already failed twice point to replacement — the second failure usually means the first fix addressed a symptom, not the cause.
Age matters too. A 10-year-old contactor in a dusty cabinet is rarely worth rebuilding. If the frame size, coil voltage, or auxiliary configuration no longer matches the application, upgrading to a correctly sized unit is cheaper than nursing an outdated one. The LC1D 09-38 A contactors cover the most common commercial and light-industrial motor sizes, while 115-150 A frames handle heavy process equipment.
The best repair is the one you never make. These five habits prevent the large majority of premature contactor failures.
When an application pushes a standard unit to its limits, WZSMO also supplies custom coil voltages and OEM configurations so the contactor is built for the job instead of tolerated.
The most common cause is low coil voltage under load, often from long or undersized control wiring. If the voltage is correct, a damaged shading ring is the usual suspect. Both are diagnosed with a simple voltage measurement at the coil.
Measure the coil resistance with a multimeter. An open circuit (infinite resistance) or a shorted coil (near zero) confirms failure. Compare your reading with the manufacturer’s datasheet for the exact rating.
Overcurrent, switching a load above the contactor’s rating, or using a resistive-duty (AC-1) contactor on motor duty. The arc melts the contact faces together on the final closure. Replace the unit and correct the sizing.
Mechanical life is typically 10 million operations or more. Electrical life depends on load current and switching frequency. Correctly sized and maintained, an LC1D contactor outlasts most of the equipment it controls.
Often yes. Contact kits, coils, and auxiliary blocks are replaceable on LC1D-style contactors. If the housing is charred, the contacts have welded, or the unit has failed before, replacement is the safer and usually cheaper route.
In PLC or electronic control circuits, yes. Switching transients from the coil can damage the output. A suppressor fitted across the coil absorbs those spikes and extends the life of both the contactor and the controller.
AC contactor troubleshooting comes down to four zones and a multimeter: verify the coil circuit, test the main and auxiliary contacts, and correct the root cause instead of the symptom. Do that, and the contactor stops being a maintenance headache.
WZSMO builds the full LC1D contactor range from 9 A to 150 A, with standard and custom coil voltages, auxiliary configurations, and OEM options for distributors and panel builders. Contact our team for replacement units, spares, or a complete motor-control solution matched to your spec.